


Undoubtedly, art is the perfect way to add extra warmth, and a little personality, character to your home. The empty walls of your room are filled with innumerable possibilities—and a few additions such as gorgeous room decor paintings or oversized mirrors can spice up every space in your home, make it even cozier and inviting!
However, finding the right piece of art for your home can be quite challenging, and placing it perfectly can be even more daunting. But, don’t fret!
We have compiled a comprehensive guide that can help you amp up your stark walls into stylish centerpieces. No matter what’s your style and taste, these simple tips and tricks will help you make the best choices.
-
Go With The Color Palette
Always remember to select an artwork that goes well with the color scheme of the room decor. If your space manifests soothing textures, sleek lines, and neutral colors, then a room painting with bold colors is the perfect selection. Or, if you have a Middle Eastern styled room brimming with bright colors, such as red, pink, yellow, golden, then a minimalistic painting that has subtle color will make it a cozy and intimate space.
In fact, it is always better to carry some swatches of colors that fill up your room when you go to purchase the artwork. It will help you find the perfect piece which harmonizes with the colors of the space.
-
Know The Wall
Space where you are willing to hang the painting also plays a significant role in choosing wall art. So, make sure to get the dimensions of the space that needs the artwork using a measuring tape. With the exact dimensions available, it will refine your search, giving you a better idea of what you would like in a room decor painting.
Make sure that the painting is in proportion to the size of the wall so that you don’t end up buying an artwork that is too big or tiny. A huge piece obviously would not fit your space, but a small piece on a huge wall will appear out of place as though floating there in the middle of lost wall space. When you go purchase the painting from a store or explore online, make sure you take note of the dimensions of the piece in accordance with your wall space to get the best match.
-
Coordinate With The Theme
As with the artworks, there is a range of styles that you can explore and choose from — landscapes, portraits, flowers, abstracts, and many other uncanny prints, make sure that you don’t get lost in their beauty but choose one that works well with the theme in your room.
For example, a lighthouse landscape will not look cohesive in a room that has been done with an Asian feel, similarly, a room painting featuring an oriental floral image will look out of place in a space showcasing a nautical theme.
No matter how much you admire the piece, if it doesn’t match your decor theme, then don’t buy it else it will end up making the whole set up look off-kilter.
-
Choose The Right Style
Of all of the ways to choose a room painting, decorating the home based on style is often the most natural, as this process of selection is more personal. A few popular examples of styles you can consider including are a focus on antique pieces, a bold form, or a more relaxed Bohemian art.
However, it is important that you choose every piece of art that matches the style of your room, including the piece of furniture, articles like rugs or decorative figurines, lamps, etc. you have collected along the way. You can either buy one oversized statement or invest in a trio and even hang several mini or smaller pieces. You can also use eclectic frames depending on your taste either by opting for the perfect matching or mismatched ones.
-
Make Your Own
In case you don’t find something that you like, drawing inspiration from seasoned artists, create your own room decor painting. You may think of creating an abstract piece, or a serene landscape or draw a floral design. Or, mix-match mediums or produce a collage painting which is quite interesting and requires less effort. Remember that your room painting should reflect your ideas and character, so don’t keep yourself confined to the traditional art techniques, instead, look beyond and explore. Don’t hesitate to paint something unconventional, however, make sure it complements the space it adorns.
Figuring out how to perfectly hang room paintings can be quite intimidating, but with these useful placement tips, you will get it right every time.
When considering how to hang artwork, the first and most crucial step is to determine where you want your wall art to be displayed. We have narrowed down some popular options:
-
At Eye Level
Design experts recommend hanging any piece of art at eye level. The center of the painting should sit at the average person’s line of sight that is 60 inches above the ground. Though hanging at 1.55 meters, to the middle of the painting is considered ideal, of course, the height will depend on factors including furniture and ceiling height.
-
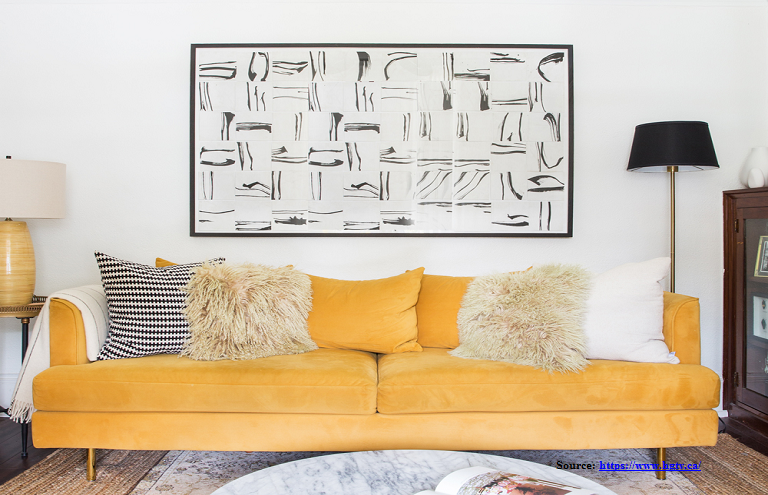
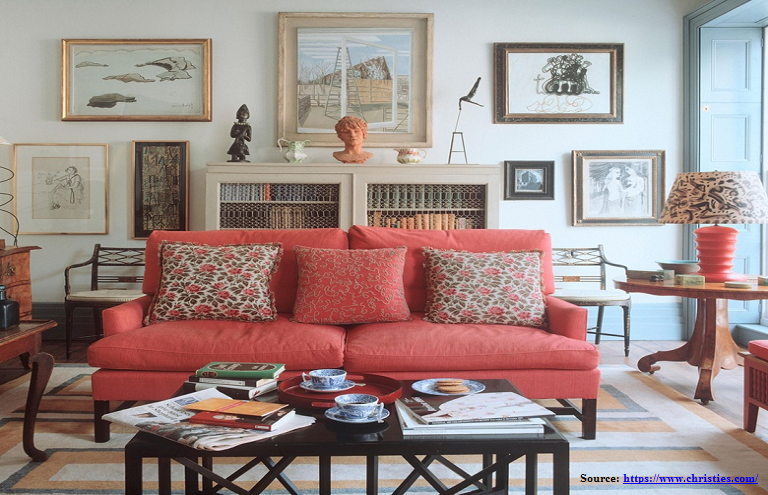
Above The Couch
While hanging the artwork above the sofa, leave at least 6-8 inches of space between the top of the sofa and the bottom of the painting. The most important thing to keep in mind here is to ensure that the room painting is proportionate to the sofa, that is its width spans no more than two-thirds of the sofa’s total length.
-
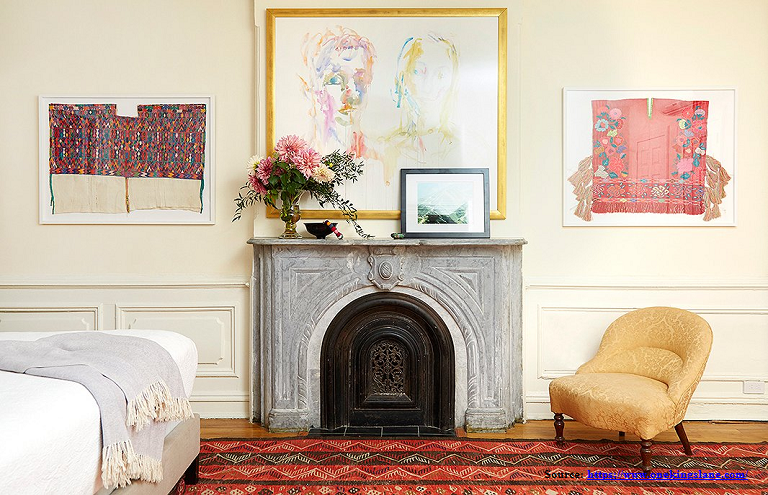
Above The Fireplace Mantle
Ideally, wall art looks best when it is wider than the fireplace opening but doesn't extend beyond its mantle, so choose the painting in accordance with the dimensions of the fireplace.
While hanging the piece, make sure that its bottom is approximately 3 to 6 inches from the top of the mantle. The taller the mantle the less space between, while with a shorter mantle you can add a bit more space.
-
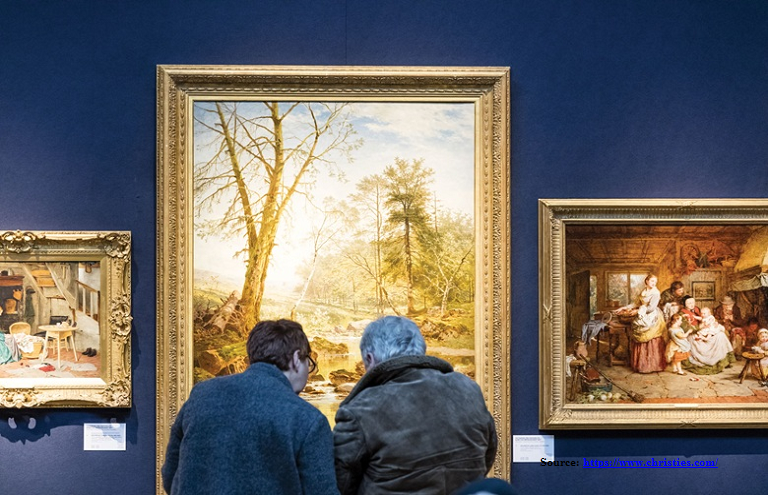
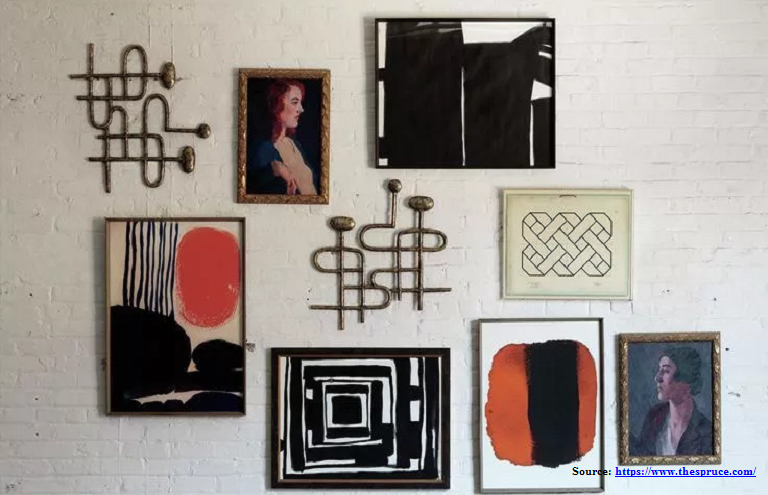
In The Gallery
While making a gallery of more than one room paintings, you can opt for a uniform look with pieces of the same size placed at equal distance from each other or try a more creative approach by placing works of different sizes and styles together. For the latter, conceive the placement of all the smaller paintings as one large piece. You can start with the largest painting as the focal point and arrange the smaller ones around it. It will also help you notice any inconsistencies or gaps in the cohesiveness of the display.
No matter what display arrangement you choose, allow at least 2 inches of space between each artwork and work to have your gallery’s center roughly 60 inches from the ground. In case you have trouble in achieving cohesiveness, try creating a gallery of uniform frames, monochromatic pieces, or solely architectural elements.
Before you start hammering nails into walls creating your gallery wall, it is advisable that you get cardboard or paper of the dimensions exactly similar to your paintings. Use these cardboard pieces to plan out your design by placing them on the wall space with painter’s tape. You can even experiment or play around with them until you map out your final gallery design.
Once you have decided on the spot for your artwork, then you need to work out the best method to hang it — sturdy and stylish. It is most likely that the traditional hammer and nail method will come to your mind first, but remember that is not always the best option available. In fact, there are several eclectic ways, some even without drilling nails into the walls to hang the artworks. However, it will entirely depend on the size of the painting and the material of the wall that which the hanging method proves to be the most effective.
We have outlined different hanging methods and respective step-by-step guides to help you know exactly how to hang paintings on a wall.
-
On The Drywall
Hanging even the lightest artwork on drywall without a stud behind it can lead to disaster without the right hardware in place. In order to hang wall art on drywall without it collapsing under the weight, you need to use good quality anchors. These small, hollow plastic inserts can be combined with the screw, and create a firm mount on the drywall panel. Gripping the drywall more effectively than the screw, these anchors can hold an approximate weight of 10–50 lbs and hold your room decor painting securely. If you are still wondering how to hang a heavy wall art using a anchor, here’s how you can install the anchors properly on the drywall:
Step 1: After marking the exact spot on the drywall, drill a hole of similar diameter as that of the tip of the anchor, using a power drill machine.
Step 2: Now, carefully install the anchor pushing it until it is firmly in place flushing with the wall. In case you use expansion anchors, use a hammer to lightly tap it into the hole. For a threaded anchor, you need to screw it into the wall with the help of a power drill machine just like you push a regular screw.
Step 3: Lately, install a screw in the opening anchor using a power drill machine until it's firmly snug in the anchor.
-
On The Plaster
Using the traditional hammer and nail method on hard and brittle plaster walls can prove to be quite intimidating. Thankfully, the alternative method for hanging paintings on such walls is quite simple and effortless. All you need is to begin by drilling a hole for the nail with an electric drill. But make sure that you drill the nail at an above angle so that the nail acts as a hook once it's hammered into the stud behind the wall.
In case your walls don’t have stud, you can use the drywall anchors and place them in a similar fashion as it is drilled into drywall.
-
On The Brick Walls
Hanging wall art on brick walls has its own challenges. The hanging method to go for will depend on the hardness and intactness of the bricks.
Before you go for drilling, consider installing brick clips that will hold tight to the edges of brick that jut out from the wall. However, these clips are a good option only if your wall's bricks are mostly intact, if the edges of the bricks are chipped or brittle, there will be nothing for the clips to grip.
Instead consider using hard wall hangers, or small hooked hangers that install with the help of very tiny nails. As these hangers' nails are so small, they are unlikely to damage the wall when they are hammered into it.
For hanging heavy-duty paintings, drilling into the brick is also an option, though quite a risky one. You will need a heavy-duty hammer drill along with a masonry drill bit. If possible, experts recommend drilling into the mortar between the bricks instead of drilling into the bricks of the walls themselves, as the damage to mortar can be easily repaired than a defiled brick. If you like to keep changing the alignment or location of the painting quite frequently, make a note of this suggestion.
Don’t get stuck with wondering how to drill into brick, the process is fairly simple. Here’s how you can do it correctly:
Step 1: Using your hammer drill fitted with a masonry drill bit, drill very carefully and quite slowly into the spot either on the mortar or brick until you have made a hole big enough to fit a plastic masonry anchor.
Step 2: Next, push or lightly hammer the plastic brick anchor into the hole until it reaches the end and is placed firmly.
Step 3: Lastly, install a screw into the plastic anchor until it's snugly in place using a regular screwdriver bit.
Traditional Ways
In case you opt for canvas art, there are several different methods for hanging it on the wall. But, always keep in mind its level, no matter which hanging method you choose– after all you don't want your canvas painting to end up hung warped.
The least damaging and most easy method for hanging canvas art is to use adhesive strips. Smaller canvases which are lightweight can be easily hung using velcro or adhesive strips. A good idea if you like to move your art around quite frequently.
Otherwise, you can go for hanging canvas art on nails hammered into the wall. Or, install sawtooth brackets or eye hooks with added wire into the back of the canvas of the painting. These elements will help you hang your painting more securely on standard wall hooks rather than regular nails.
Recap: Time To Hang
Step 1: Use painter’s tape to determine the exact placement of your painting. If you are hanging more than one, be sure to use the tape to mark the spot where you want each painting to be hung. It will also help you spot any discrepancies.
Step 2: Mark the spot where screw, anchor, nut or hook will be placed in the wall, using a pencil. To highlight the height difference between where the hanger sits and the top portion of your painting, measure the length from the hanger to the top of the frame. In case you are hanging a canvas or a frame without installing any hardware, measure the length from the top edge of the painting to the lip of the frame where the screw or nail will rest.
Step 3: Place the chosen hanging method to the wall. If using hanging strips, attach them to the frame before the wall. If using more than one strip, ensure they are all facing the same direction for easy removal.
Step 4: Now, go and hang your painting. Finish up by checking the placement with a level and nudging a side up or down if needed. Be careful about this as what looks right up close may look slanted from afar.
Wrap Up
While practical measures and tips will guide your search for the perfect room decor painting when it comes to hanging, there really is no right and wrong — your artwork collection should be organized and in a fashion that appeals to you. If the painting is good enough it really doesn’t matter where and you hang it — it will look good anyway.
