


Offering a wide range of textures, consistencies, and hues, acrylics are extremely versatile and vibrant so much so that no other painting medium can beat it. Highly flexible, they can be painted on almost anything as long as the surface is water-resistant, and also can be applied as thick dense color by drawing directly from the tube or watered down and easily layered infusing depth and ethereal quality to the work. Also, as these paints are opaque and fast-drying, it gives you ample opportunities to cover up mistakes with more paint and add astounding details. These are good enough reasons to try your hand at acrylic portrait painting at least once. However, you'll need to brush up on your acrylic painting techniques before you get started.
We have compiled an easy guide — from preparing the kit to advanced techniques, to help you get used to the versatile medium of acrylics:
-
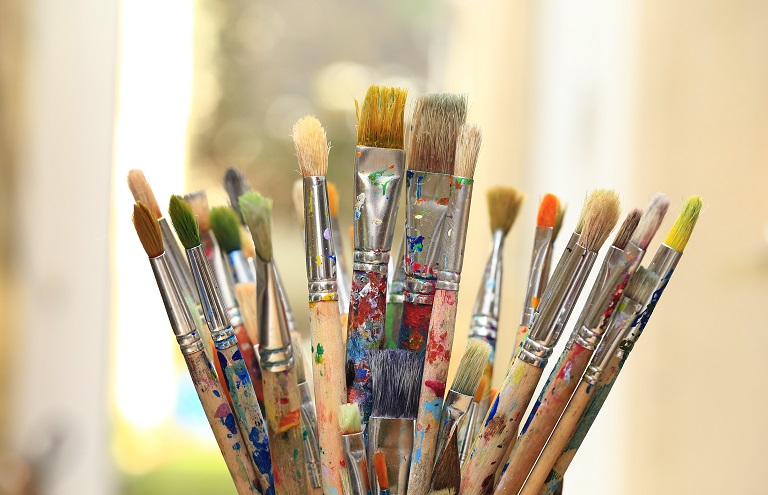
Paintbrushes
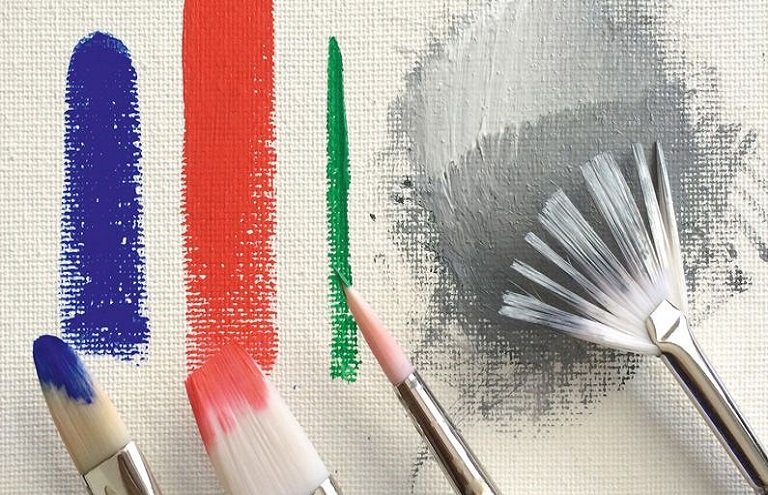
Firstly, let’s get familiar with the key paint brush shapes and sizes that will be useful while painting with acrylics, and also explore what purpose (technique and levels of details) each serves the best.
- Flat or rectangular paintbrushes have square and quite flexible ends and are capable of holding a lot of paint. If used flat, they can help you make long strokes, and are considered an excellent option for blending acrylics and covering large areas in paints. For more delicate lines and small touches, you can use its tip and sides.
- Brushes that have a large belly and tapers to a fine point are called round and pointed brushes. They are ideal for making bold strokes over large areas, however, can also be used to render fine lines and details in the artwork.
- Paintbrushes are usually available in three different sizes — mid-size brushes are best suited for versatility, small-size brushes are good for doing detail work, while large-sized ones are used for painting larger portions and washes.
Unlike oil or watercolor, paint brushes used for acrylic painting are made from synthetic materials. This has less to do with morality, it’s only that synthetic bristles cope well with the resin of acrylic, and can easily sit in water.
While setting up your kit for acrylic artworks —portrait, landscape or abstract paintings, make sure that you have a good variety of paint brushes — from small to large. If you are a beginner, you will find the mid-sized flat and mid-sized round brushes most useful. However, as your skills will broaden and you get hold of techniques, you will find which brushes you are most comfortable with and will easily learn to put almost every brush type to its best use.
-
Know Your Paints
There are a myriad of acrylic paints available in the market, the techniques and surfaces you plan to put to use will decide the type of acrylic that’s best for you. To begin with, you can choose from professional and artist-grade acrylics that come in many different formulas with different properties and applications. However, don’t limit yourselves, make sure that you experiment with a variety of types and brands to see which one you enjoy painting the most.
Acrylic paints are generally categorized according to their thickness often referred to as ‘body’. Unlike other painting mediums, consistency is no indication of quality for acrylics, here are some most commonly used types of acrylics:
- Heavy Body paints are the thickest and heaviest acrylics and the most popular too. They have a smooth buttery texture, and when it comes to handling and rendering brush marks and gestures, they seem closest to oil paints. They work best on rougher canvases, where they hold on their own. So, if you are planning your acrylic portrait painting on rough canvas, heavy body paints are your go-to acrylics.
- Soft Body paints are also smoother acrylics with a consistency similar to that of yogurt. This property of soft body acrylics makes them ideal for mixing with other painting mediums, wherein it is capable of retaining enough thickness to be painted smoothly as well as responsively.
- Fluid acrylic paints resemble the texture of double cream. Usually sold packed in a bottle, they are perfect for rendering smooth brushing or giving staining effects to your abstract paintings. Many seasoned artists use it for glazes and adding finely detailed work.
- Acrylic Ink is made of super-fine pigments in an ultra-modern suspension of acrylic emulsion which is flowy as water. The most fluid of the acrylic paints, you can use an airbrush, pen, or brush to apply it on the painting surface. These inks are intensely colored and render a soft glossy finish on drying.
- Open paints are acrylics that have extended drying time. This is what makes it easy to use for painting wet-into-wet or blending color to create different tones. They’re great for you if you are looking to incorporate techniques that are possible only with oil paints in your acrylic portrait paintings.
- Interactive acrylics are the ones which the regular fast-drying artist-grade paints, however, now within the range there are those formulated with a unique ‘unlocking formula’ — a liquid is provided that can re-wet the dried interactive acrylic paint and can even slow its drying on adding a few drops the wet paint. When the painting is finished completely, the layer of the final paint applied can be sealed using a fast-medium/fixer making it no longer unlockable.
- Acrylic Gouache is a creamy paint with a velvety matt finish. However, unlike regular gouache (opaque watercolor), these are not rewettable once dry. As this paint levels brush marks, it is quite popular among illustrators. They are great for you if you are looking to paint blocks of flat color in your work.
- Acrylic Markers are perfect for you if you are looking to combine painting and drawing techniques in your acrylic painting. Supplied as bright, bold, marker pens, acrylic markers are formulated to be high covering with quick-drying time. Also, these are water and abrasion proof and adhere to most surfaces, ranging from paper to metal, and can easily make their mark even on brightly colored or painted surfaces.
- Acrylic Spray paint lets you apply thin layers of bold color onto a wide range of different surfaces.
-
Mixing The Acrylics
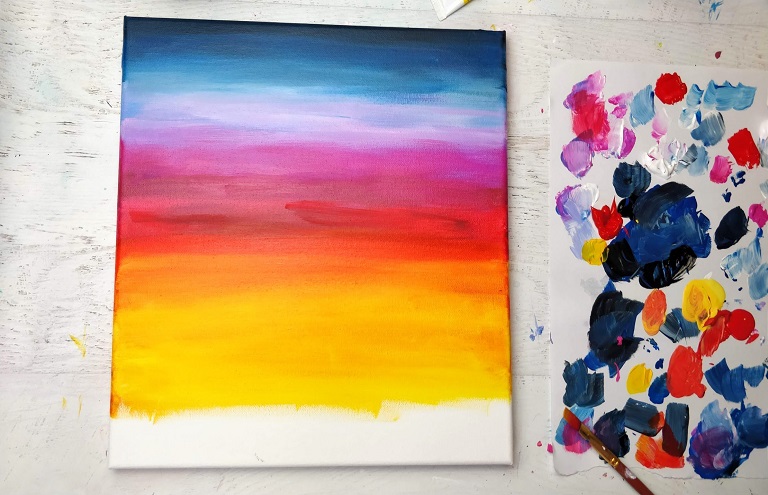
As we all know that mixing colors is a precise process and a familiarity with the color wheel will help you mix very specific hues as you work. For instance, combining red and yellow in different quantities will give you a variety of oranges. Adding in some greens will give you subtle brown and other burnt umbers. While mixing acrylics, go for using a palette knife, a plastic knife, or even a paintbrush. Remember to mix thoroughly and also keep in mind that there are some colors that look a slight shade darker when dry, so decide accordingly.
-
Misting: Preventing acrylics from drying out
It is well-known that acrylics dry quickly and sometimes pretty too quickly. So, it is essential that you know how to keep them moist so that you can paint properly.
The easiest way to keep acrylic paints moist is to mist them with water, you can even use plant misters or spray bottles which can be bought from any hardware or gardening shops. Depending on what surface you have chosen for your artwork, you can even water your acrylic paints down by mixing more water so that it almost resembles watercolor. This proves to be a valuable trick while quickly laying in an underpainting.
-
Using The Gesso Base
Gesso is often used to prepare the painting surface where this white paint mixture makes the surface ready to accept the paints, particularly oil and acrylics. So, after stretching the linen for your canvas, apply a coat of gesso for a smoother and slightly textured surface where the paint can be pushed around on. However, be careful while choosing the acrylic gesso as it is a little different from traditional gesso as it contains latex. Many artists also use gesso to lay interesting textures in their abstract paintings, you can also take inspiration from their techniques.
-
Glazing: Sealing Acrylic Paintings
In case you are planning to paint over a pencil portrait sketch, make sure to seal it with a glaze. While doing so, go for using a gel medium as it will give you the most even surface to paint over.
Here’s the detailed process:
Firstly, select the color you wish to glaze with, for instance blue.
Secondly, mix a small quantity of gel medium and the blue together with just a little mist of water so that the mixture loosens up.
Once you find that the mixture is even, gently apply the glaze over the pencil sketch and the surface for your acrylic portrait painting is ready.
-
Blending With Acrylics
When it comes to blending acrylic, it is indeed one of the trickiest techniques to master. This is how you do it correctly:
Firstly, paint a layer of white using a paint brush with a flattened oval head, then, add in your color along the lowest portion of the area you want to be blended. Now, stroke back and forth, and quite rapidly up and down the entire region till a nice gradient from your color to the previously laid white is visible.
While blending acrylics, working wet into wet is undoubtedly the best way to but you can also use dry blending. Simply, lay in the color and when it’s dry, put in another color over it.
Building Texture
While building texture in acrylics, go for wet in wet and over dry. In fact, it's best to use this technique when you find that the color or surface underneath is dry enough. You can start by loading the brush with color and paint it in a shape into the previously laid dry background. From there dragging out the other side of the stroke, feather it into the canvas and further paint below and you are done. The best part about acrylics is that it allows you an incredible amount of control over them and they will stay put (pretty much) wherever you place them.
-
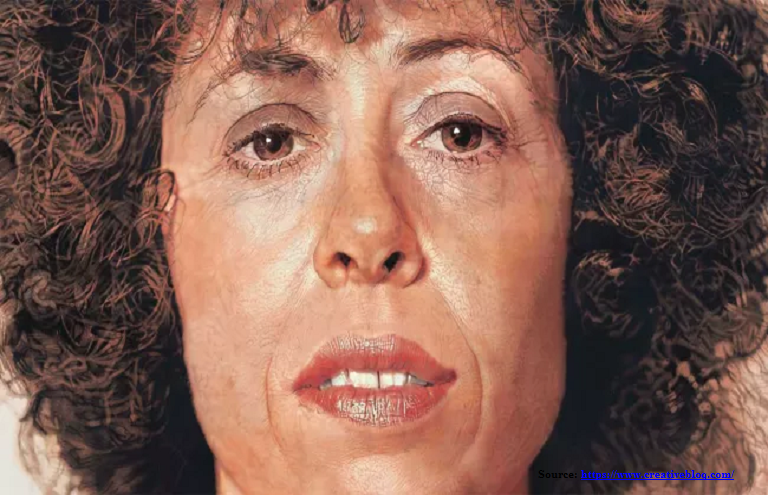
Creating Skin Tones
If you attempt to apply thick pigments of acrylic, you will find that these paints have somewhat plastic texture (being synthetic) and become glue-like, making it quite frustrating to use. This happens usually while creating skin tones in acrylic portrait paintings. Instead work around by treating the acrylic as the water-based medium (that it is), patiently building up several thin layers of subtle colors.
The key to this technique is putting the acrylic pigment very thin (barely there) on the paint brush. Secondly, a wet palette is important when mixing. Allow short drying time between washes so that you don’t end up damaging the successive applications of color. Lastly, remember to have tight control of your palette as you stack the washes slowly. As you gradually apply the layers, you find the effects getting richer with the results being gorgeous — lively and compelling skin tones.
A step-by-step guide to help you achieve thinly washed skin tones using acrylics:
-
Draw faint outlines
Begin by drawing a faint sketch on a gessoed surface (such as a composite panel board) using a mechanical pencil, perhaps with a 2B/4B lead or one of your own choice. Once the outline is in place, use a kneaded eraser to lift the pigments of the pencil back off.
-
Lay down a thin wash
Carefully, cover the entire surface with a thin wash of Ultramarine and Burnt Umber acrylics. This will help you seal the pencil sketch from smearing, and at the same time, this color would serve as a nice base for building skin tones.
-
Build lightness and darkness
Now slowly block in the values (from lightness or darkness), using the same color mix but with a bit of Titanium White for more opacity. This mixture will be very thin making the previously laid layer visible even in the darkest portions allowing you to lay the skin tones properly later.
-
Finish the color
For skin tones, use a very light wash of Cadmium Red and Cadmium Yellow Light, along with Venetian Red and Titanium White to alter temperature. Try to keep more saturated hues near the edges where you find shadow transition for better effect.
Don’t forget to share your experiences and a photograph of your acrylic painting in the comments section below!
